

Getting Started
Discover how to configure and use the Salesforce toolbox for Youtrust's API.
This guide will require you to have a Salesforce and a Youtrust organization. If you only wish to try it out, you can create a Salesforce Developer account and a Youtrust Trial Account for free.
NoteWe strongly encourage you to check the Youtrust API quick start guides before. That way you will gain insights on its key concepts.
For the following steps you will need an admin access to the Youtrust webapp and setup rights in Salesforce.
Install the Salesforce toolbox package
This is the most technical part, we are here to guide you through it step by step.
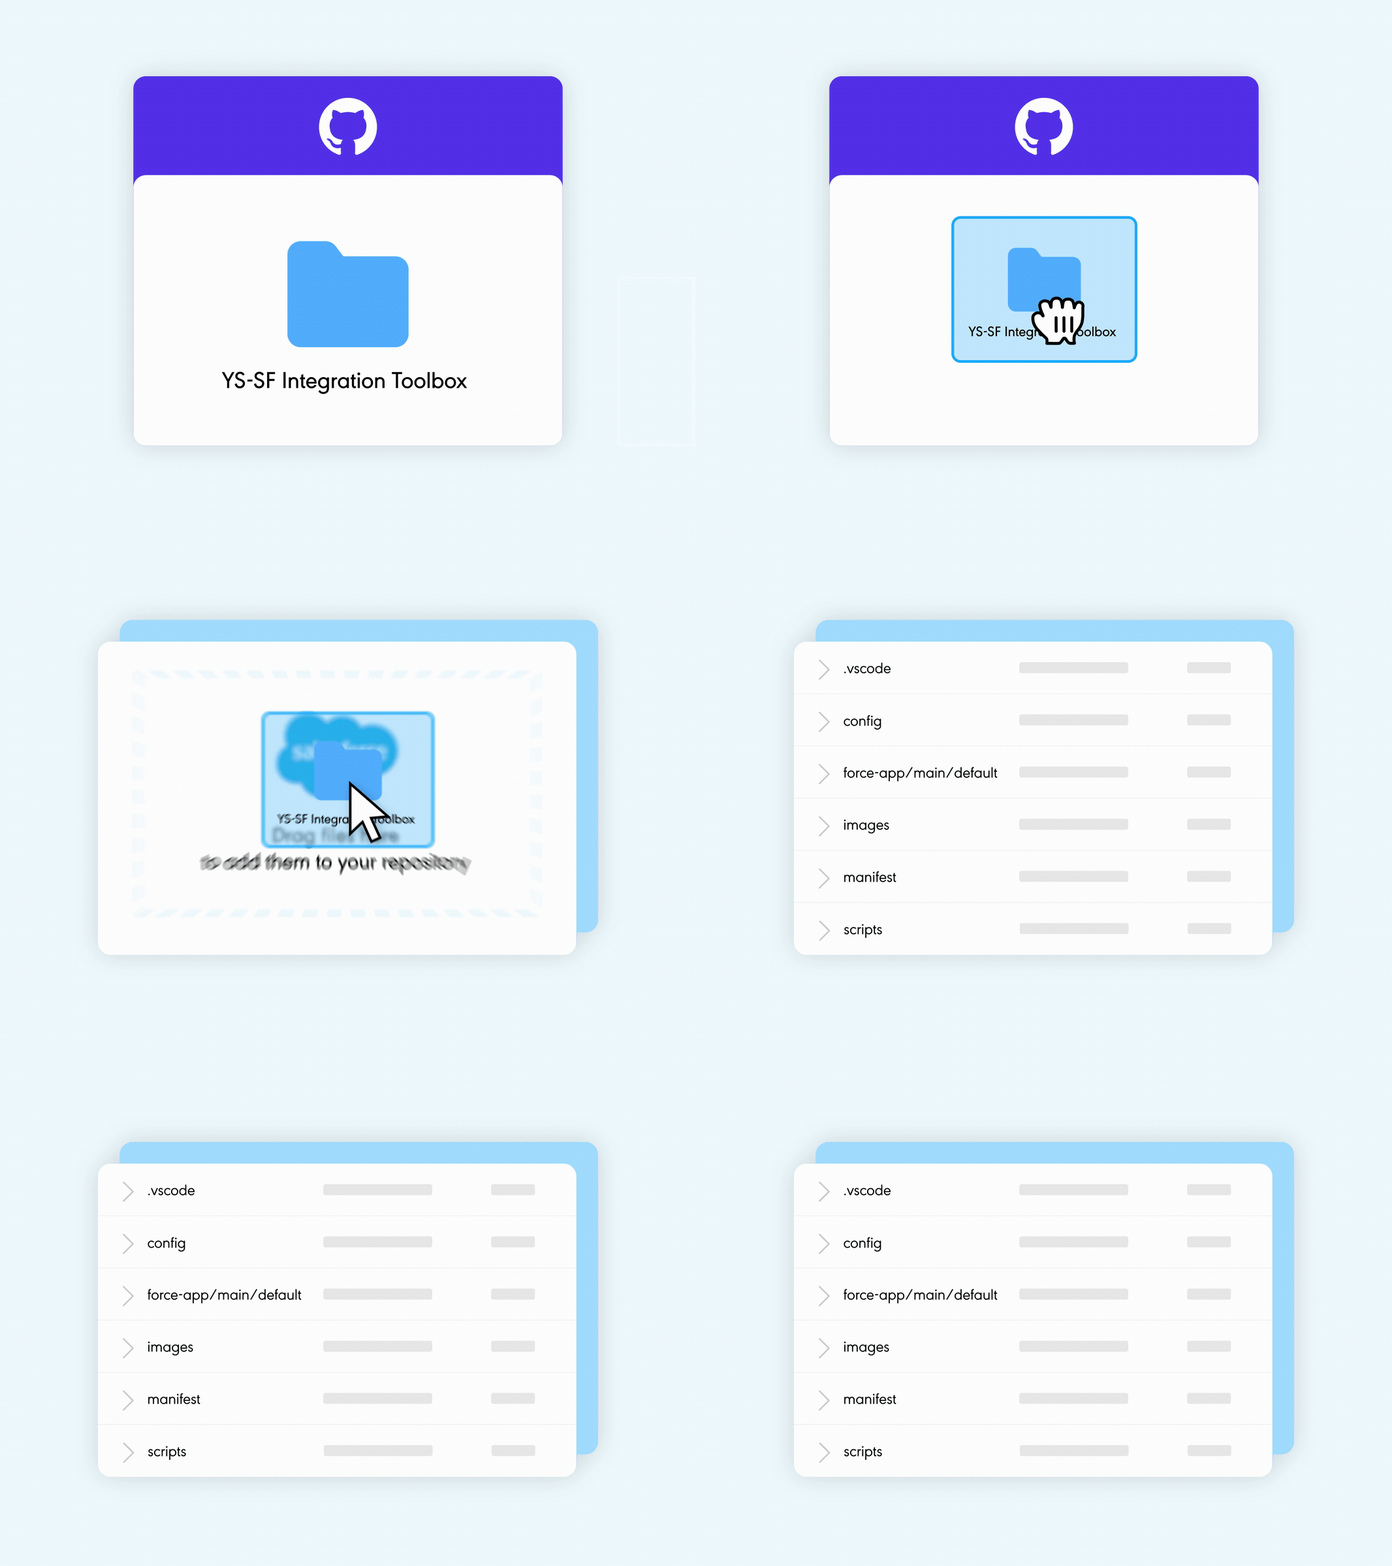
We made this toolbox to ease the Youtrust API integration inside Salesforce and for you to focus on your specific business cases. As such, the first step is to import it in your own Salesforce organization.
You can find all the sources and the steps to do so here.
Use the Youtrust API in Salesforce
Are you still with us and done with the package deployment? Well, there is good news, if you have code phobia and wondered if this would give you nightmares tonight, rest assured: now, only admin tasks are needed.
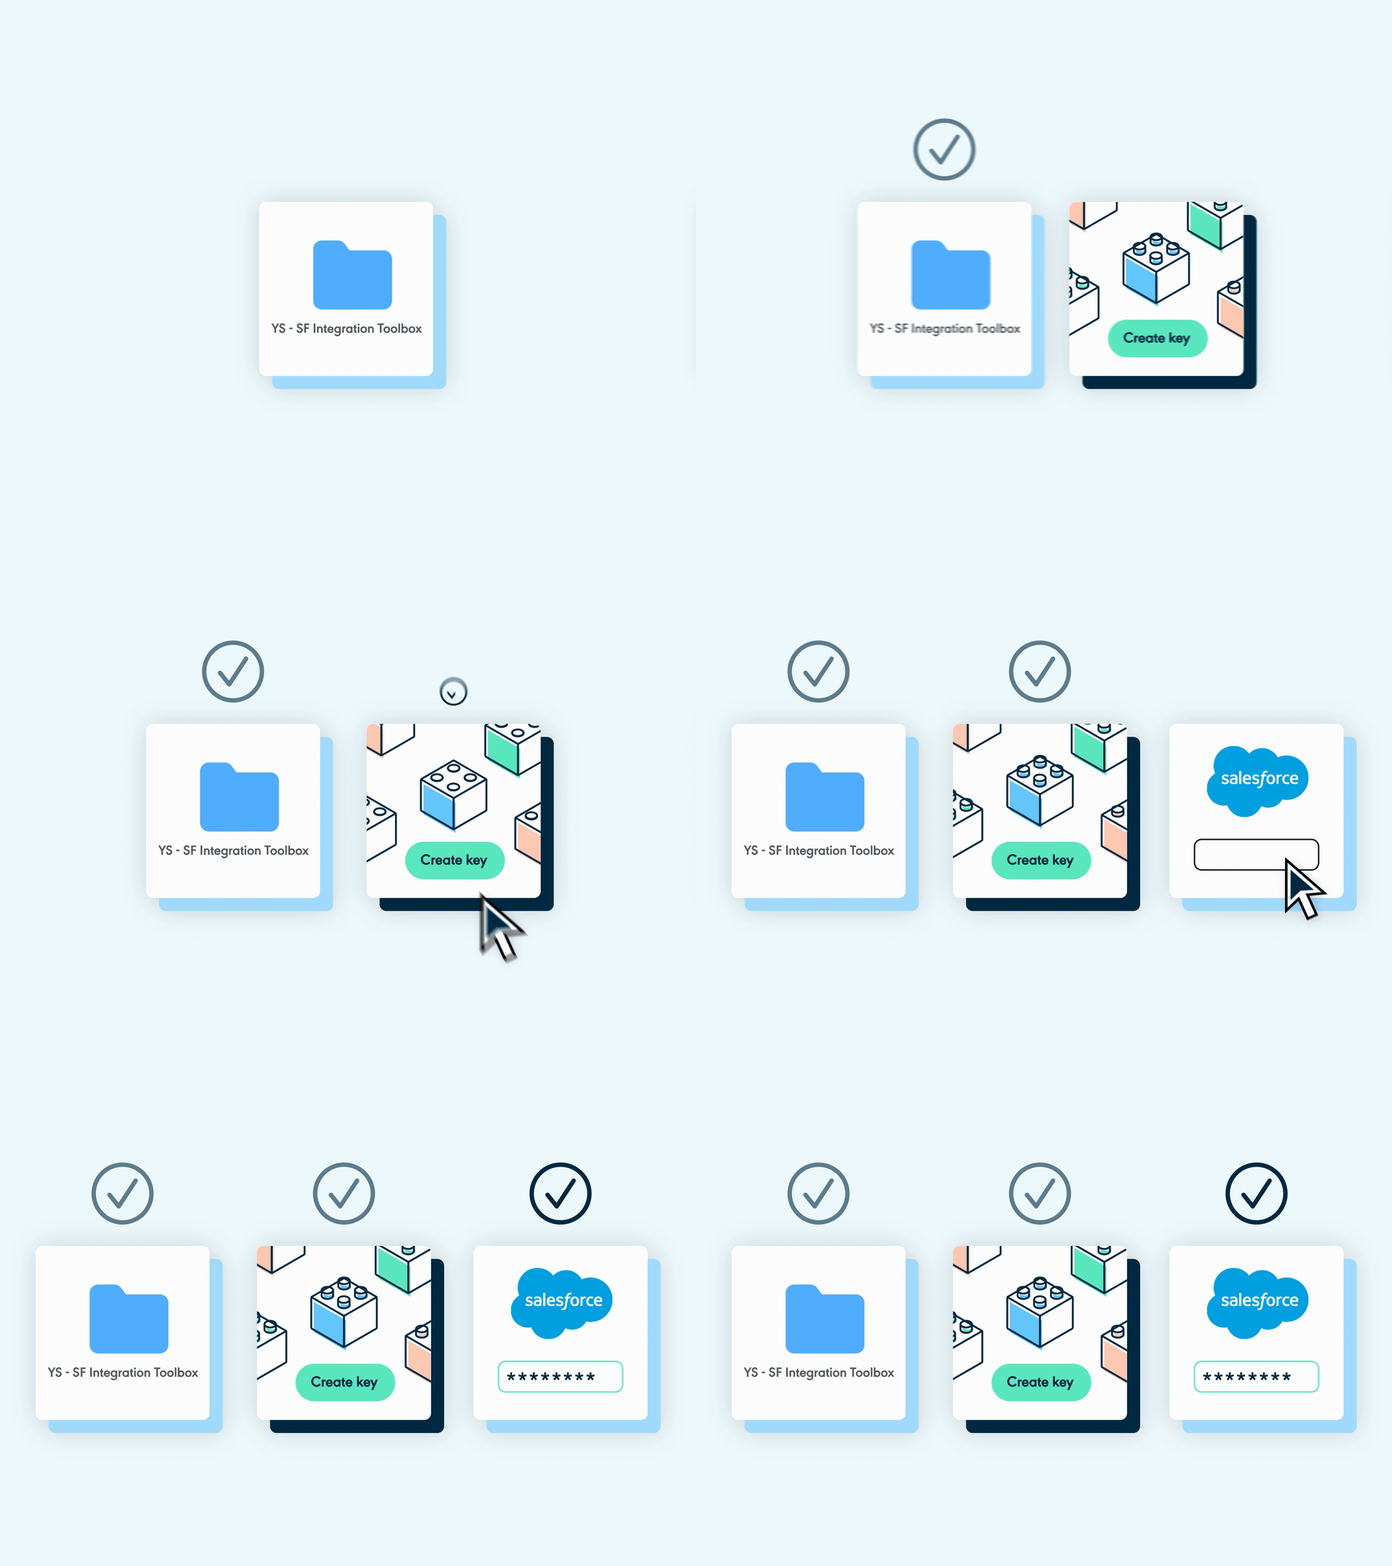
Creation of the API key
- Log into your Youtrust web application
- Go to the
Integration > APItab. If you are in a trial version, start your API trial. - Create an API Key.
- Description
Salesforce - Sandbox Full Access - Environment
Sandbox - Permissions
Full-Access
- Description
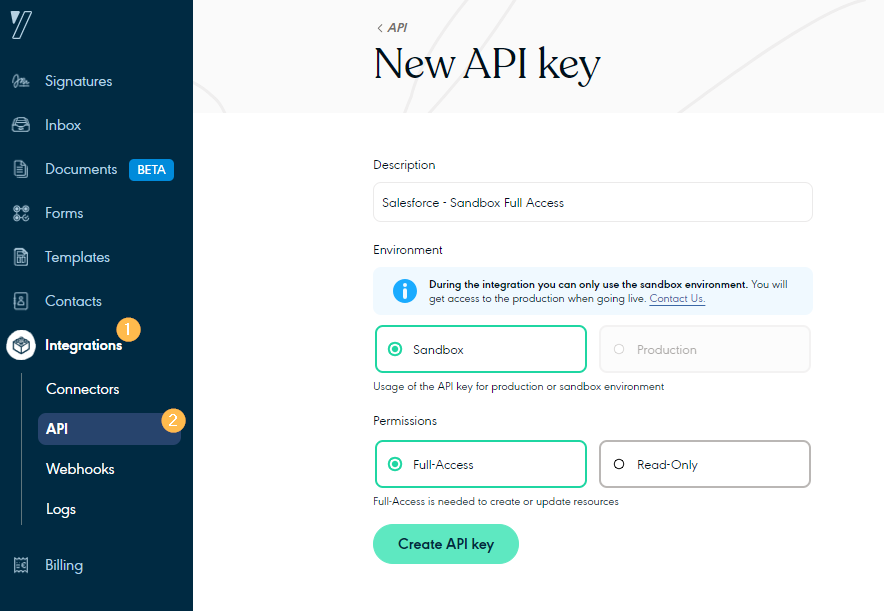
Now that it is created, you can now copy the API key value; we will use it right after.

Configure Youtrust access in Salesforce
You can now log into Salesforce but do not close the Youtrust application yet: (spoiler) we will still need it afterward.
-
Go to
Setup > Security > Named Credentialsthen click on theExternal Credentialstab. -
Select the
YS - Sandboxexternal credential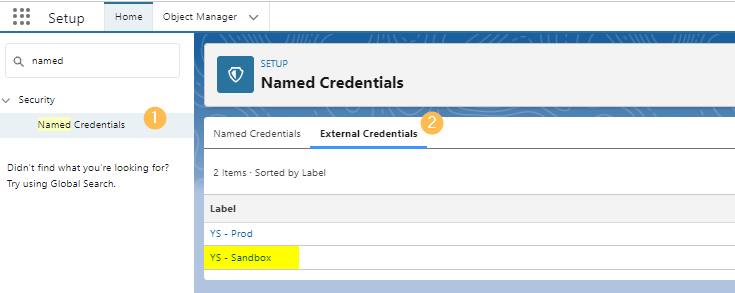
-
Edit the Principal called
Authorization Tokenand create a new value with the nameAPI_KEYand paste the API key value you got from the Youtrust Application previously.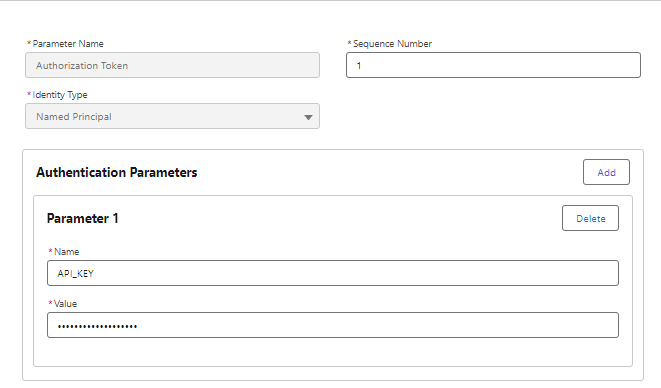
-
In the setup, go to
Users > Permission Setsand select theYS_Sandbox(it might not be on the first page).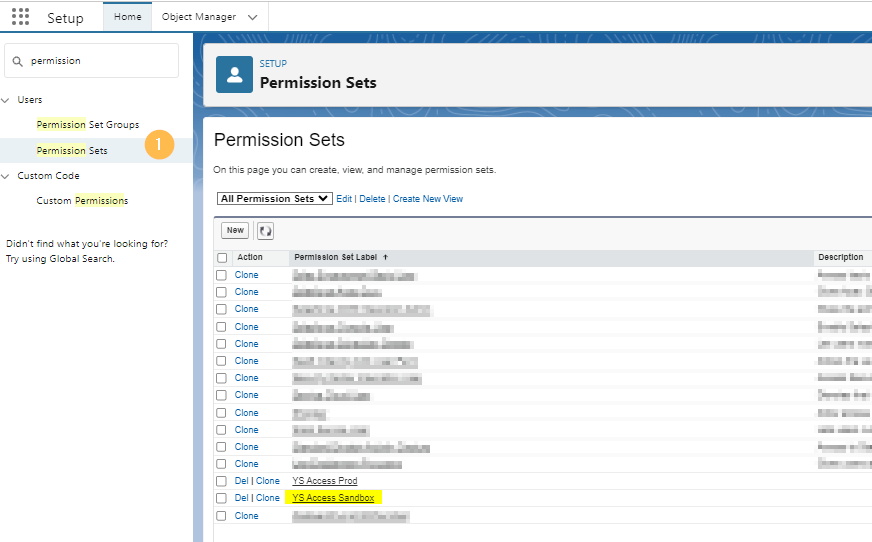
-
Go to
Manage Assignmentsand assign the permission set to yourself. -
Do the same with the
YS_ObjectsPermissionspermission set: select it and manage assignments to assign the permission set to yourself.
Now you have access to use the API! You can test that in the following way:
-
Open the developer console
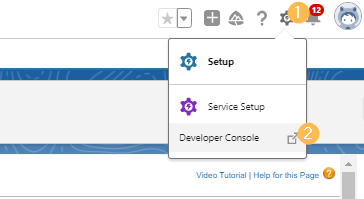
-
Press
Ctrl + E(on windows) orCommand + E(on mac) to open an anonymous code window -
Clear what is inside the anonymous window if there is something.
-
Copy + Paste inside the following code. It will get your Youtrust user info.
// We use the Named Credential we previously configured String credential = 'YS_Sandbox'; String basePath = '/v3'; // Youtrust endpoint for the test call String endpoint = '/users'; String method = 'GET'; Integer timeout = 10000; // construct HTTP request HttpRequest request = new HttpRequest(); request.setMethod(method); request.setEndpoint('callout:' + credential + basePath + endpoint); request.setTimeout(timeout); try { // send HTTP request HttpResponse response = new Http().send(request); // treat HTTP response System.debug('🤞'); Integer statusCode = response.getStatusCode(); System.debug('Status Code 👉 ' + statusCode); if (statusCode == 200) { System.debug('🙌'); // SUCCESS! You want to see this System.debug(response.getBody()); } else { // You don't want to see this System.debug('😭'); // You managed to call the API but there was an error during the call (ex: 405 if you made POST instead of GET) System.debug('[' + statusCode + '] ' + response.getStatus()); } } catch (Exception e) { // You want to see this even less 😱 // Error on SF side. The probable causes are // - The name of the credential doesn't match your Named Credential name. // - You haven't assigned yourself the permission set. // - There is an error on the on the principal API_KEY value (name or value) System.debug('🌋'); System.debug(e); } -
Tick the
Open Logcheckbox then clickExecute.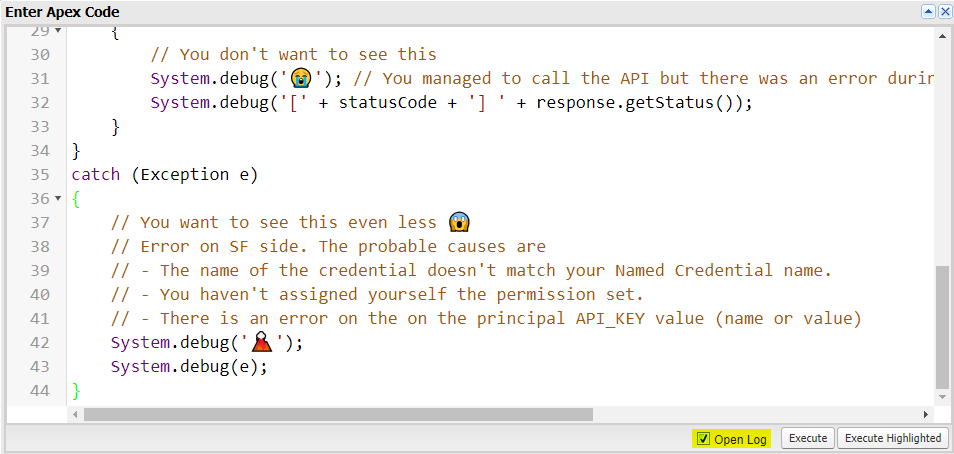
-
In the opening tab, tick
Debug Only. -
In the debug log you want to see
🙌and do not want to see😭nor🌋. Hopefully your debugs logs will look like this: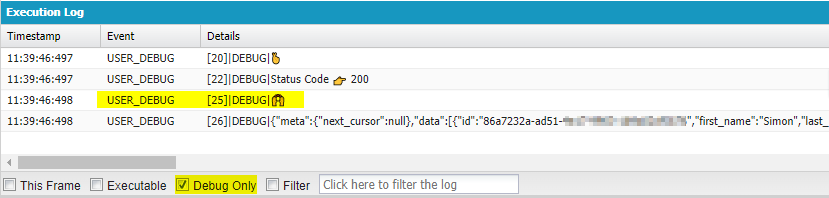
You got the high-five 🙌Congratulation you made your first Youtrust API call with Salesfore, well done!
You did not get the high-five but😭or🌋Please refer to the following and check you completed all the previous steps. The devil is in the details...
- You got
😭: this means that you managed to call the API but there was an error during the call (ex: 405 if you made POST instead of GET)- You got
🌋: there was an error on Salesforce side... here are a few probable causes:
- The name of the credential doesn't match your Named Credential name
- You haven't assigned yourself the permission set
- There is an error on the principal API_KEY value (name or value)
Before continuing, let's have a quick look at what we did earlier:
- we imported a package inside our salesforce organization, containing means to access and use the Youtrust API
- we configured access for our Salesforce user using a new API key generated in Youtrust
- we are now able to use the Youtrust API to query or send information
But this is not the end, we can make better usage of Youtrust's API
If we are able to send or query information through Youtrust's API when we want, sometimes Youtrust wants to notify you of important updates that happened inside the application like when a Signer signed a Document.
Allow Youtrust to notify Salesforce
This could help you!If you are not familiar with webhooks, this is not an issue and you can proceed forward without it but we kindly advise you to check the dedicated section to understand the base principles (not more than 5 min required).
Create a public site
Domain configuration
This step might be unnecessary for your organizationIn developer edition, this step is already done by default. Also, in production organization, you might already have configured a domain for another business need before.
- Go to
Setup > Company settings > My domain. - Choose a domain name, check for availability then register the domain.
- Once it is ready, click on
Log inthen onDeploy to Users.
Public site creation
As for the previous step, you might experience small differences from one salesforce edition to another. The principle stays the same.
-
Go to
Setup > User Interface > Sites and Domains > Sites. -
Choose a site name, check for availability, accept the Sites Terms of Use then register it.
-
Click on the button
New:- Site Label
YS webhooks - Site Name
yswebhooks - Put a System Administrator as the Site Contact & Default Record Owner
- Suffix Default Web Address by
yswebhooks - Tick
Active - Active Site Home Page
InMaintenance
- Site Label
-
Click
Save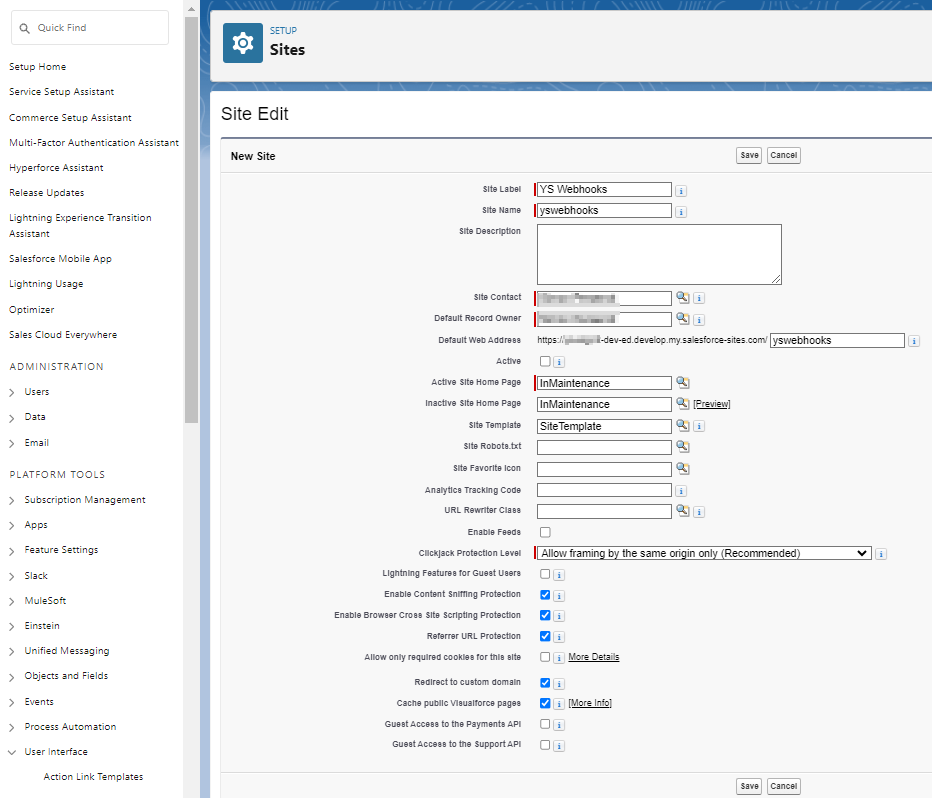
Public site access settings
-
Click on the
Public access settingsbutton.
(if you already closed or change the page from the last step, can access it by going back toSetup > User Interface > Sites and Domains > Sitesthen selecting the previously created one) -
Click on the
Editbutton nearEnabled Apex Class Access. -
Add the
YS_WebhookListenerclass then hitSave.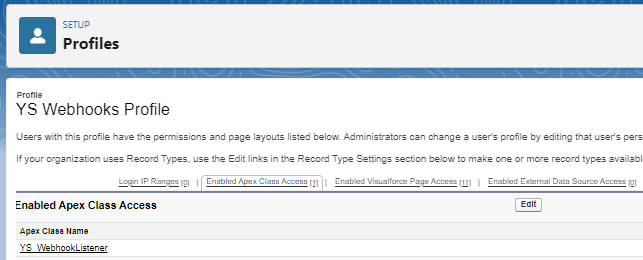
-
Once back on the Profile page for the public access settings, on the top of the page, click the
Editbutton (next to theView Usersone). -
Scroll down to the
Platform Event Permissionsand grantReadandCreateaccesses to theYS Eventsobject. ClickSaveafterward.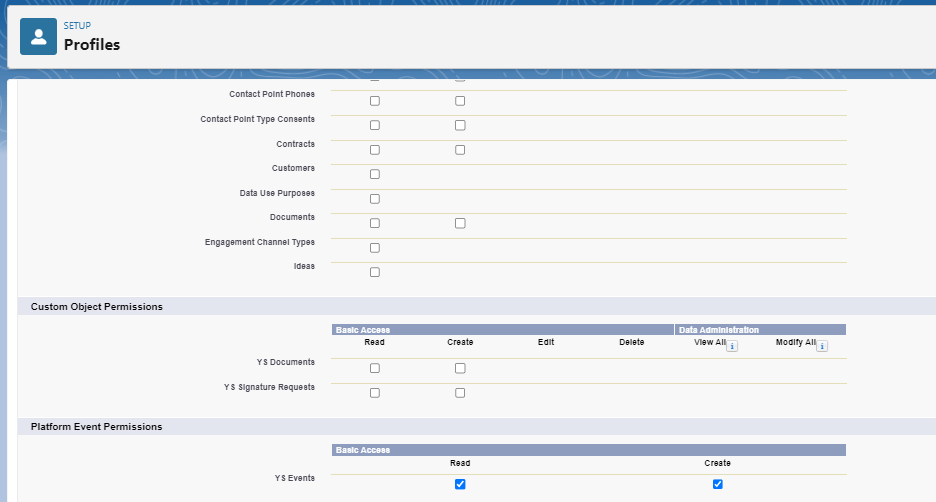
Tell Youtrust where to notify Salesforce
In the previous step, we created an endpoint that Youtrust can contact freely to send Salesforce some notifications. Now, we need to tell Youtrust where we want to be notified.
Create a webhook
-
First let's copy your site url (the endpoint mentioned above). Go to
Setup > User Interface > Sites and Domains > Sitesand copy the Site Url next to yourYS Webhookssite. -
Go to your Youtrust account
-
Go to the
Integration > Webhookssection. Then hitAdd a webhook.-
Endpoint: paste the value you copied at step one and suffix it with
/services/apexrest/ys/webhooks.
It should look something likehttps://XXXXXXX.my.salesforce-sites.com/yswebhooks/services/apexrest/ys/webhooks -
Description
Salesforce - Sandbox -
Environment
Sandbox -
Subscribed events
Trigger on all events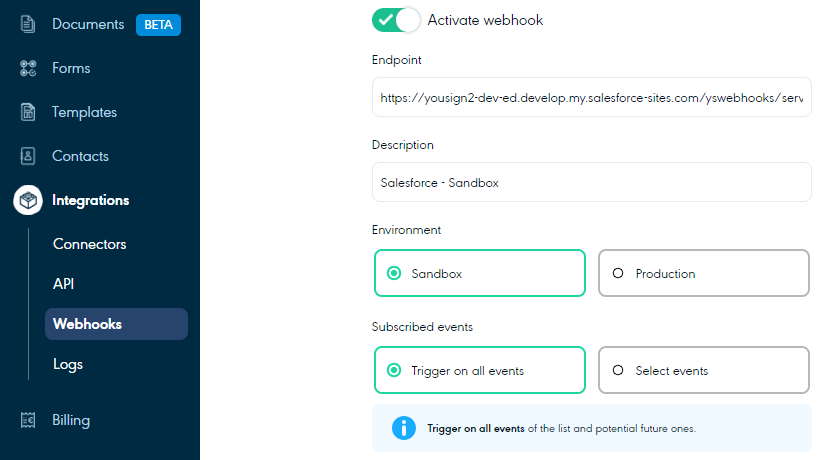
-
-
Click
Create Webhook. -
Click the 3 dots under
Actionsand selectCopy secret key. -
In Salesforce go to
Setup > Custom Code > Custom Settingsand click onYS configuration. -
Click
New(the one above the sectionDefault Organization Level Value).-
Tick
Is Sandbox. -
Paste the Secret key in the
YS Encoding Keyfield. -
Click
Save.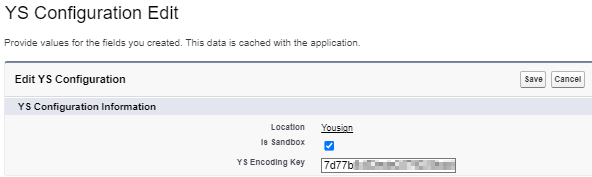
-
Encryption KeyThis security layer is directly implemented in the Youtrust Toolbox. It makes sure that the webhooks Salesforce received comes from Youtrust.
Going to Production
To use the toolbox in Salesforce production environment, you will need to redeploy the package into this organization. Please follow the steps available here.
To connect Salesforce to the Youtrust production API follow the same steps as previously. This are the only differences.
-
Create an API in Youtrust but select
Productionas environment. Refer to the Creation of the API key section of this guide for more details). -
Add this API Key in Salesforce in the
SF - Prodexternal credentials and assign it to yourself or needed users through theYS_Prodpermission set (also add theYS_ObjectsPermissionspermission set for needed users). Refer to the step Configure Youtrust access in Salesforce of this guide for more details. -
Create Webhook for Youtrust Production but select
Productionas environment. Do not tick Is Sandbox in SalesforceYS Configurationcustom setting. Check the Create a webhook section for more details. -
Switch the credentials used by the External Service to the Production ones.
-
Go to
Setup > Integrations > External Servicesclick on theYSExternal Service. -
Click Edit. Change the Named Credentials to
YS_Prod.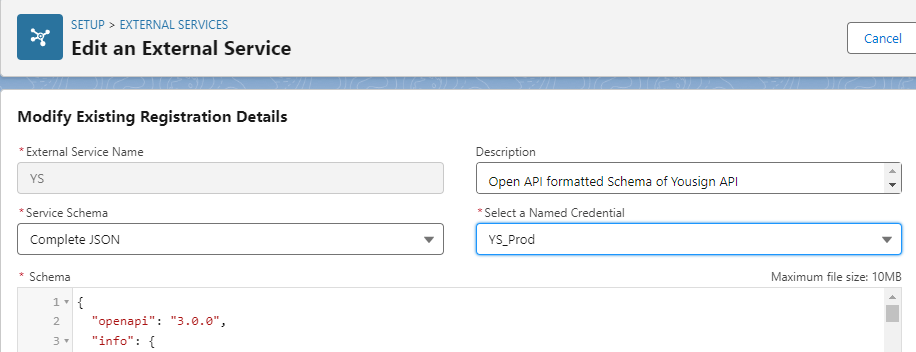
-
Click
Save & NextthenNextthenNextagain and finallyFinish.
-
Updated 3 months ago
What’s Next
After all the hard work comes the reward: sending document to sign directly from Salesforce! You can also find more about the functionalities offered by the toolbox.