

Integration best practices
This page helps reduce the number of failures during image-based identity verification by providing tips integrated into the verification process.
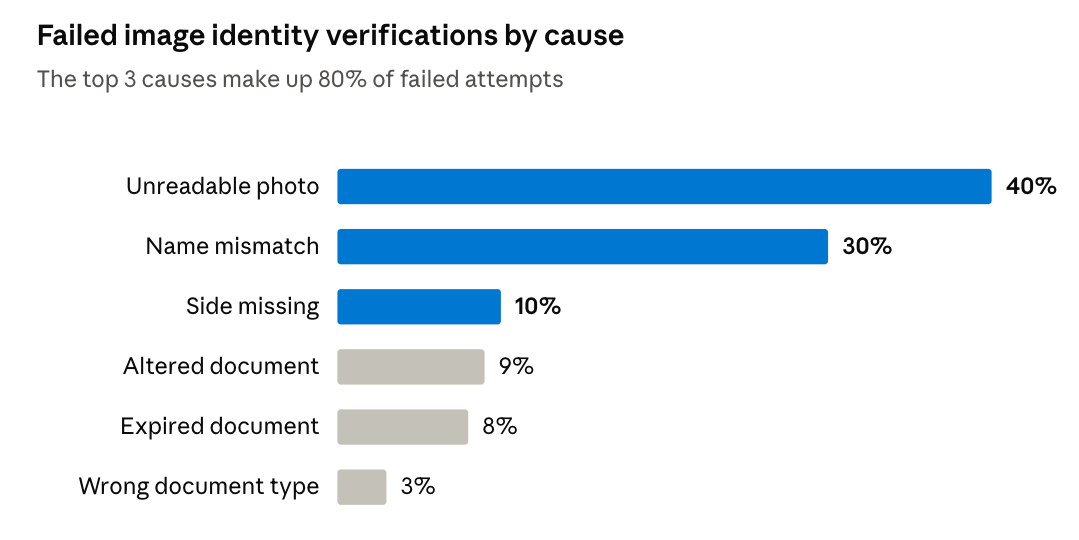
Most failed image identity verifications are not fraud. They come from how your flow collects the document and the name: a blurry photo, a missing back side, a name typed differently from the ID.
This page lists the changes to make in your flow. Each one shows the failure cause it prevents, an example of a correct integration, and the step to reopen if the verification still fails, based on its status code.
It is written for the product and front-end teams who build the screens your end users see. For the API call itself, see Request an Image Identity Verification.
Why verifications fail
Each recommendation below shows the cause it prevents. Several address the same cause, so their shares do not add up.
Name input
1. Collect the name exactly as printed on the ID
Prevents: name mismatch, 30% of failed attempts.
Ask for the first name and last name in two fields, empty, with the hint "Exactly as written on your ID document". On a French ID card, for example, the last name is the birth name, not the married name. Remove titles such as "Mme" before sending, and keep accents and hyphens.
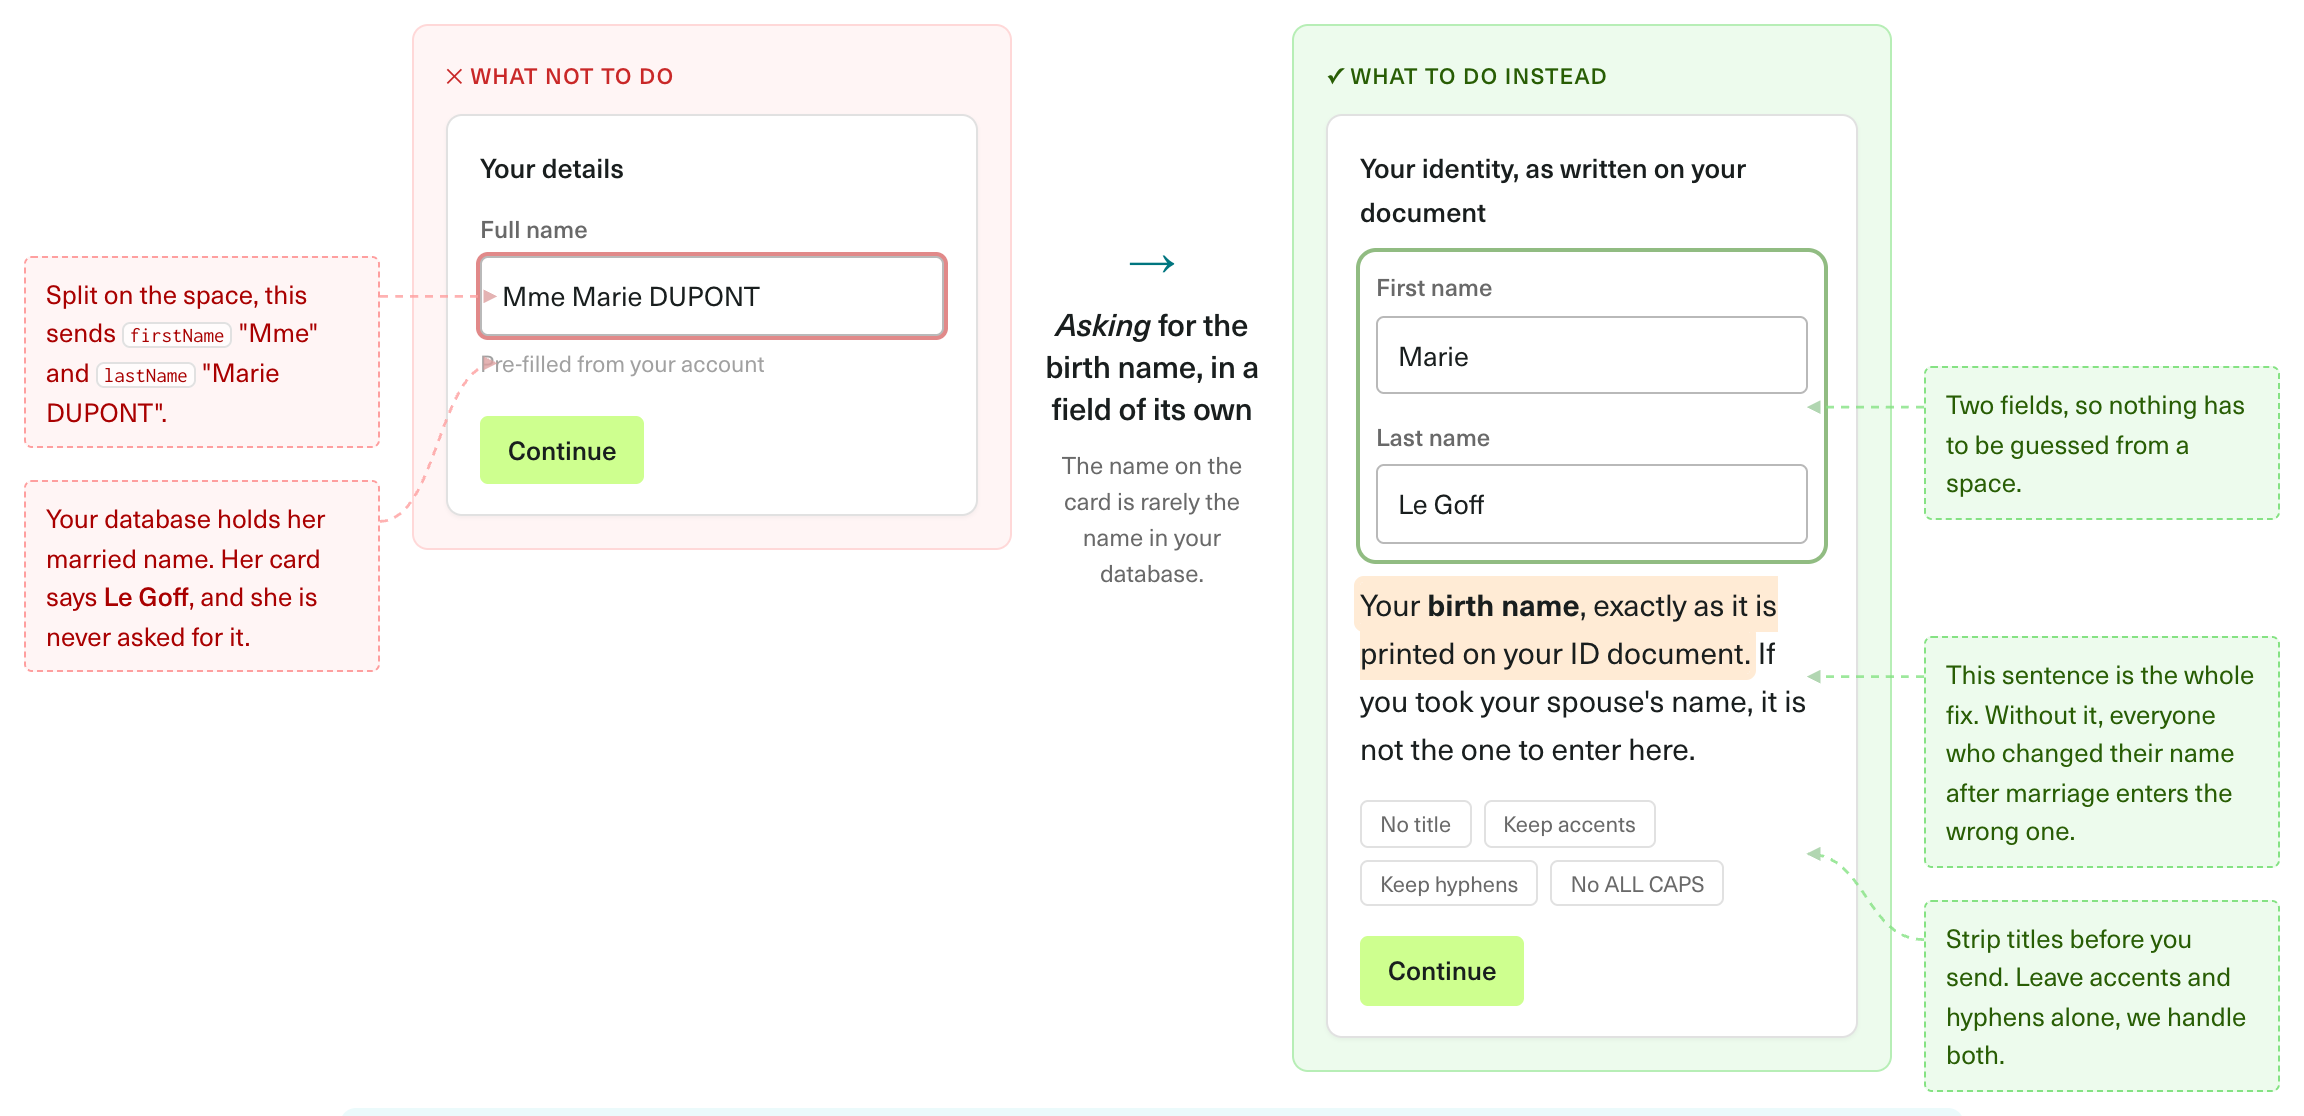
If it fails: IDDV_1706 (last name), IDDV_1707 (first name) or IDDV_1709 (names inverted) → reopen the name field with the hint. Do not ask for a new photo: the document was read.
If you cannot rely on the name you have: omit first_name and last_name. The verification runs on the document alone, and you compare the extracted identity with your own records.
Document capture
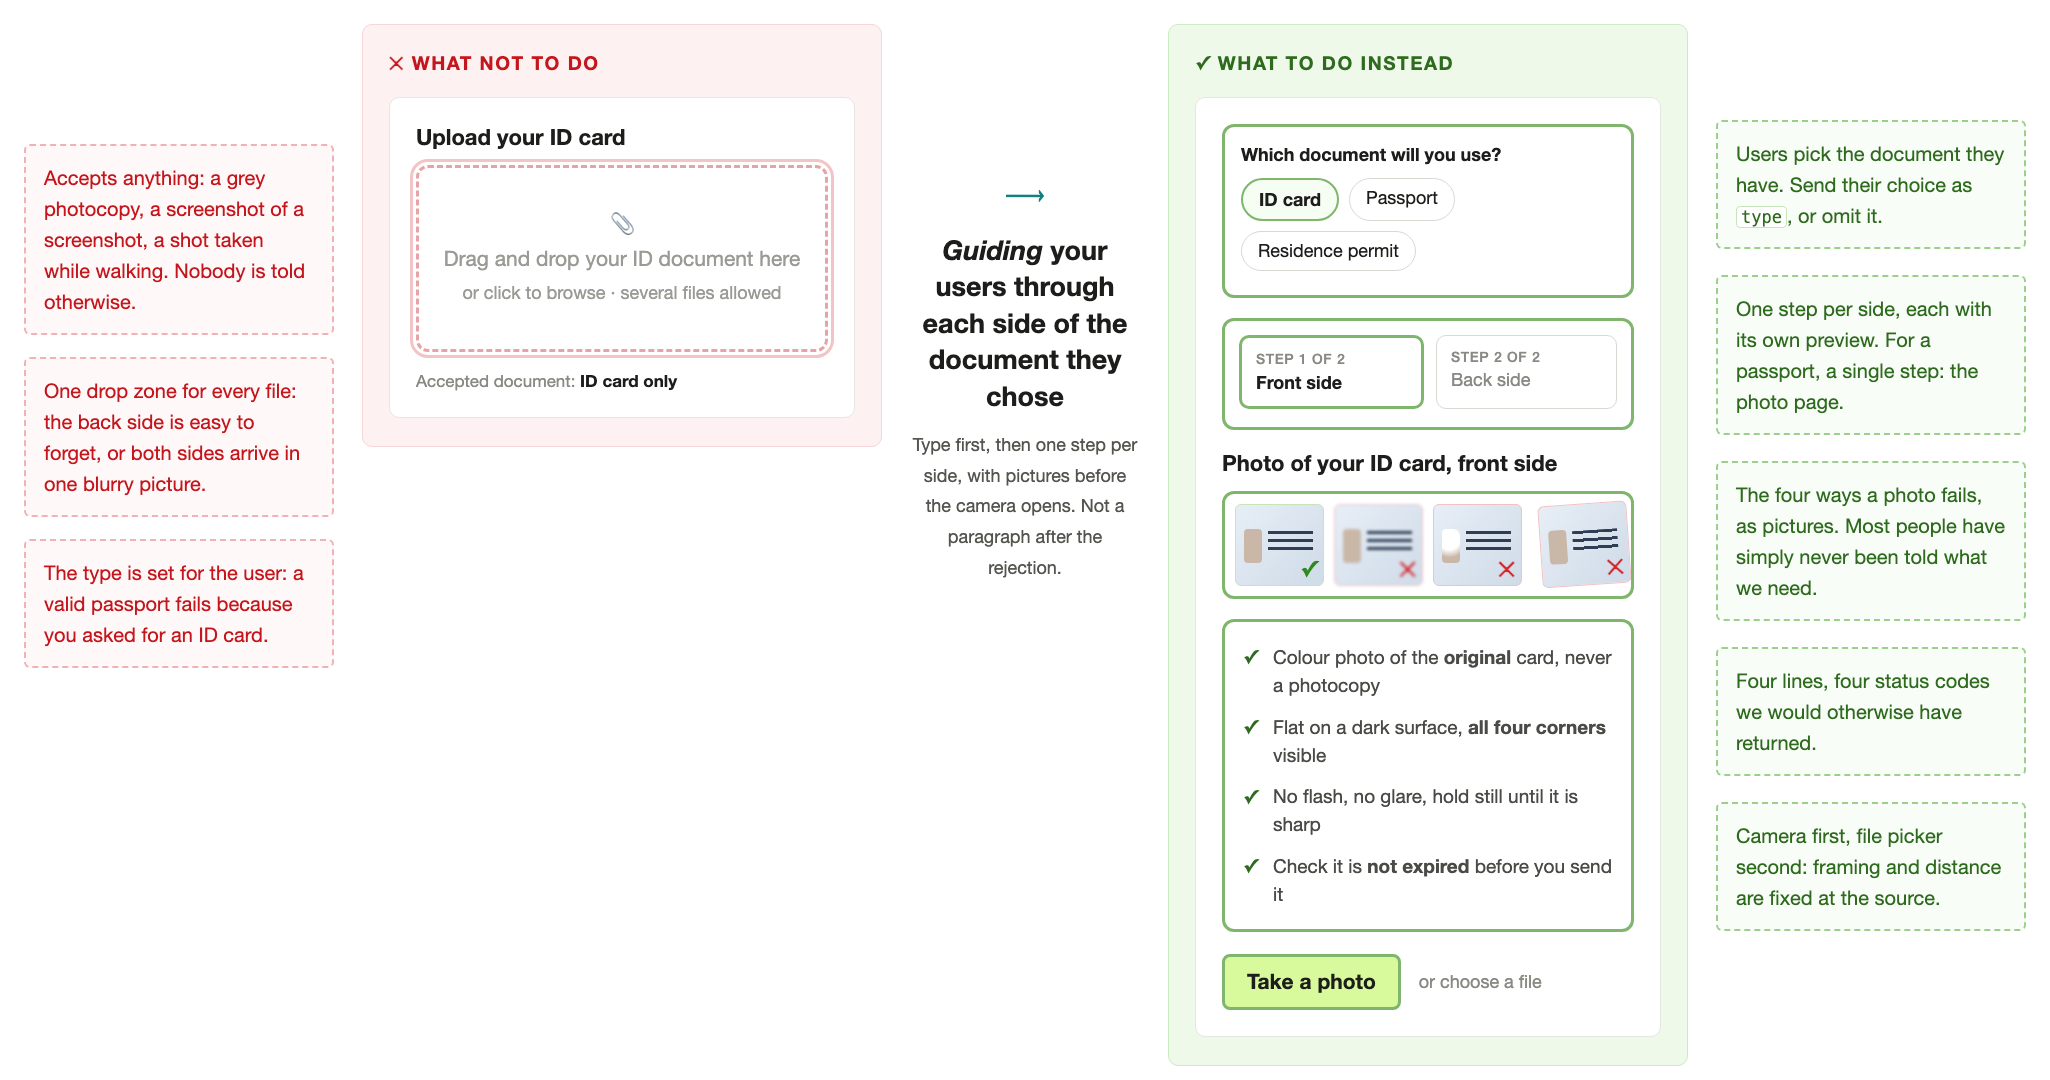
2. Let users choose the document type
Prevents: wrong document type, 3% of failed attempts.
If you set type, a valid document of another type fails: a passport fails when you asked for an ID card. Let users choose the type and send their choice, or omit type.
3. Ask for the front and back in two separate steps
Prevents: side missing, 10% of failed attempts.
Use one step for the front and one for the back, each with its own label and preview, instead of a single drop zone that accepts several files. For a passport, ask only for the photo page.
If both sides end up on a single image or PDF, make sure each side is upright: a back side that is rotated or upside down is not read, and the verification fails with IDDV_1507 (back side not found).
4. Show how to take the photo before the camera opens
Prevents: unreadable photo (40% of failed attempts) and expired document (8%).
Show example photos and short instructions on the upload screen, before the camera or file picker opens. On mobile, open the camera first with a card-shaped overlay, and offer the file picker as a secondary option.
Put these instructions in your own copy:
- Place the document flat on a dark surface · Turn off the flash · Keep all four corners in the frame · Hold still until the image is sharp. Glare, motion blur and cut corners are three separate status codes, and this one line prevents all three.
- We need a colour photo of the original document, not a copy. A photocopy or black and white scan loses the document's security features and most of its contrast. Check the image in the browser and reject black and white images before upload.
- Check that your document has not expired. You cannot fix an expired document, but a check before upload saves your user the upload and the wait.
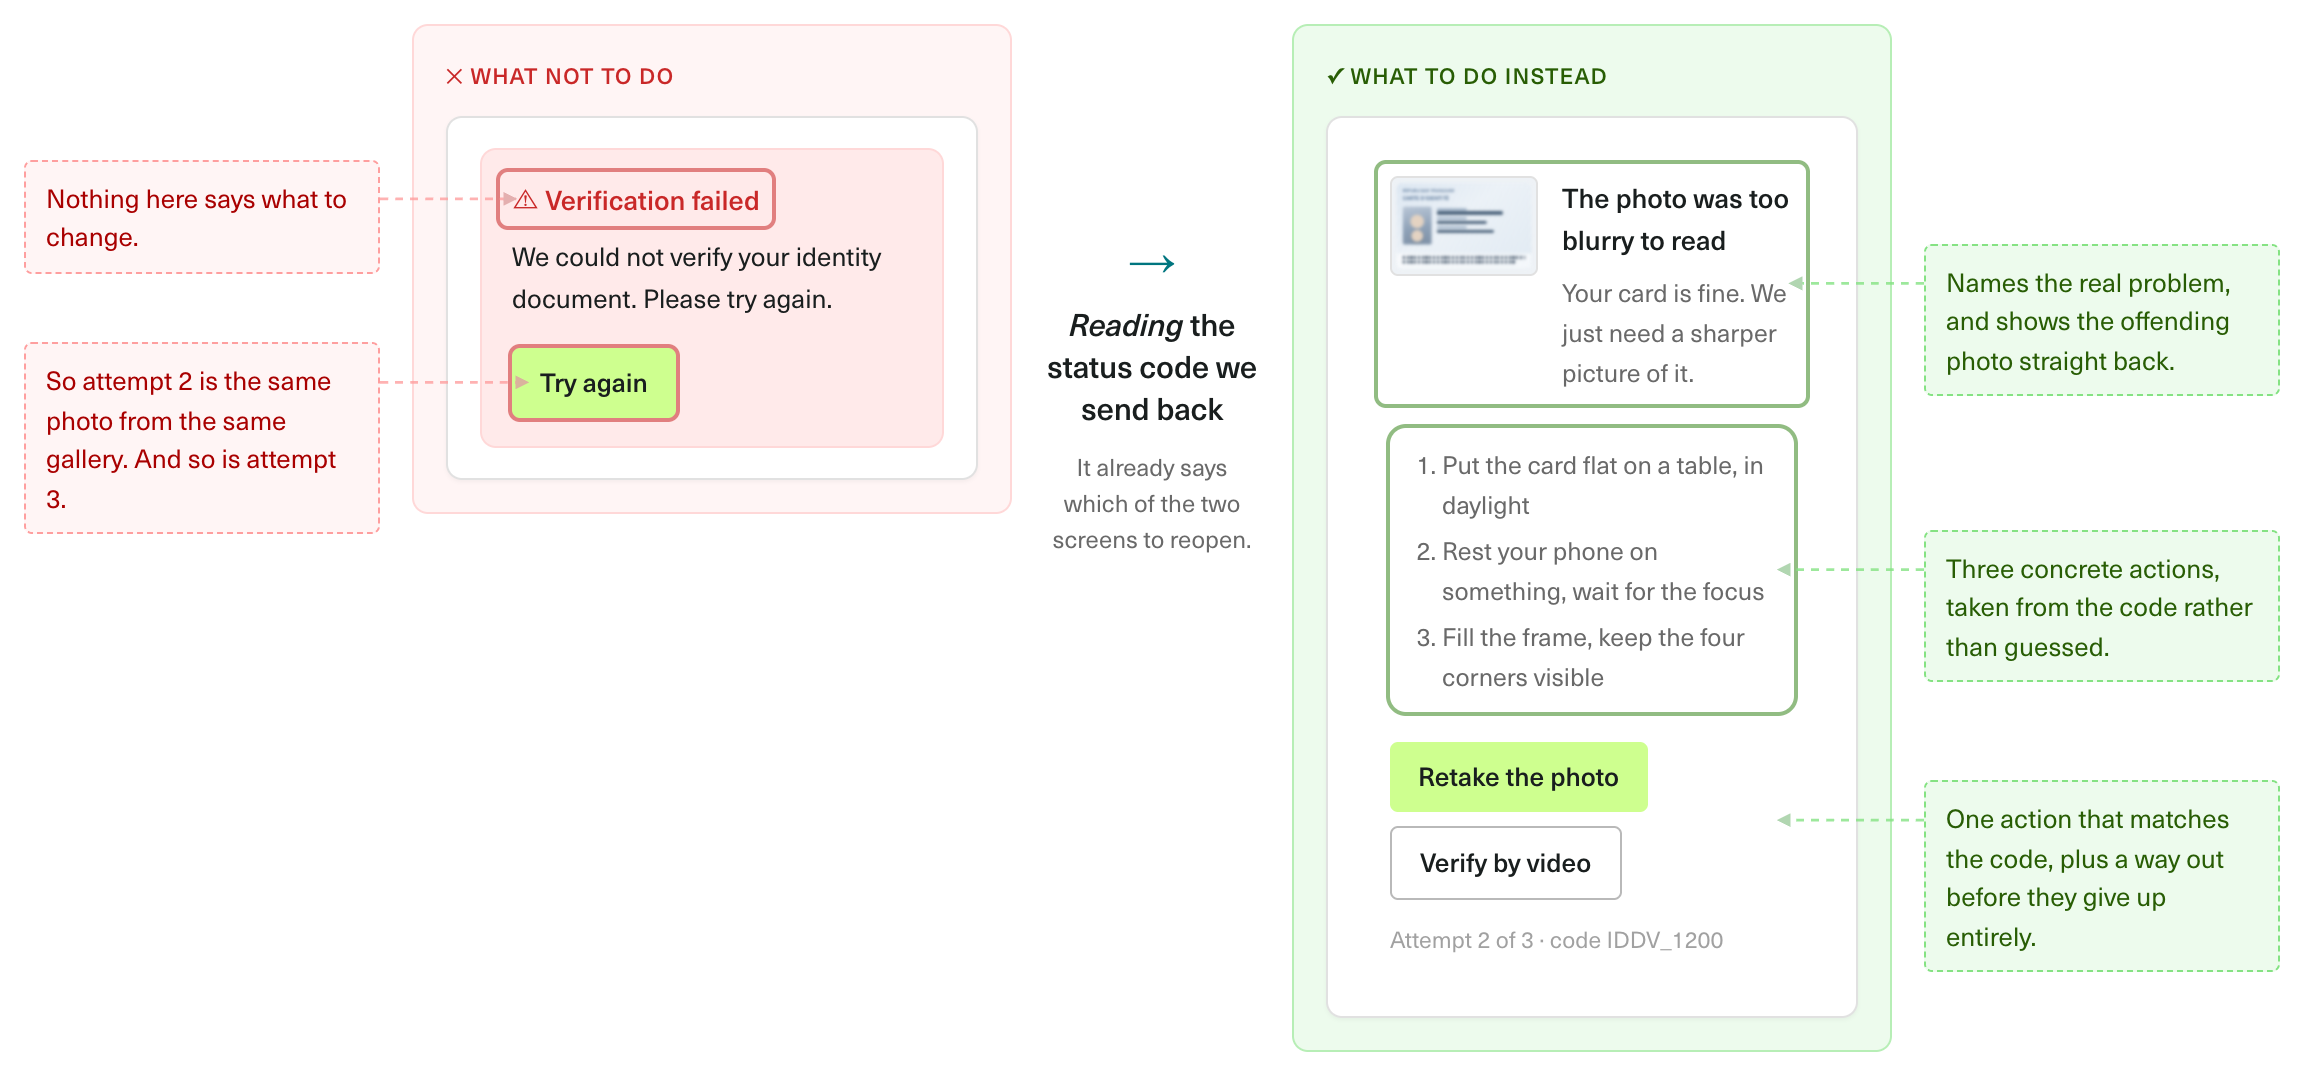
If it fails: an image issue (IDDV_1200 to IDDV_1208) or IDDV_1508 → reopen the camera step. Show the failed photo next to the instruction that matches the code.
In a nutshell: the document capture flow
Before you send the file
5. Validate the file in the browser
Prevents: file errors.
Check these constraints before calling the API, and show a specific message when the file does not meet them.
| Constraint | Value |
|---|---|
| Formats | PDF, JPG, PNG |
| Max file size | 10 MB |
| Min resolution | 320 × 256 px |
| Max resolution | 20 megapixels |
6. Send one document for one person per file
Prevents: ambiguous files.
A PDF with two people's ID cards is ambiguous: we cannot know which holder to verify. Say it on the upload screen, and split the file if you can.
Example message: Upload one document, for one person.
7. Flatten PDFs before sending
Prevents: altered document. PDF annotations alone cause 0.3% of failed attempts.
Annotations and edit layers in a PDF are read as signs of tampering. Flatten the PDF before sending it, or ask for a photo instead.
After a failed verification
8. Show the reason and reopen the right step
A generic "Verification failed, please try again" leads users to send the same photo again. Read the status codes instead. A verification can return several codes, so handle each one.
9. Limit retries and offer a fallback
After two or three failed attempts, stop the retry loop. Offer another route, such as a manual review on your side.
Related pages
Updated 18 days ago